Lightroom Classic isn’t quite as customizable as Photoshop, but you can still make it more user-friendly, increase your efficiency, and hide parts of the interface that you don’t often use.
Panel Groups
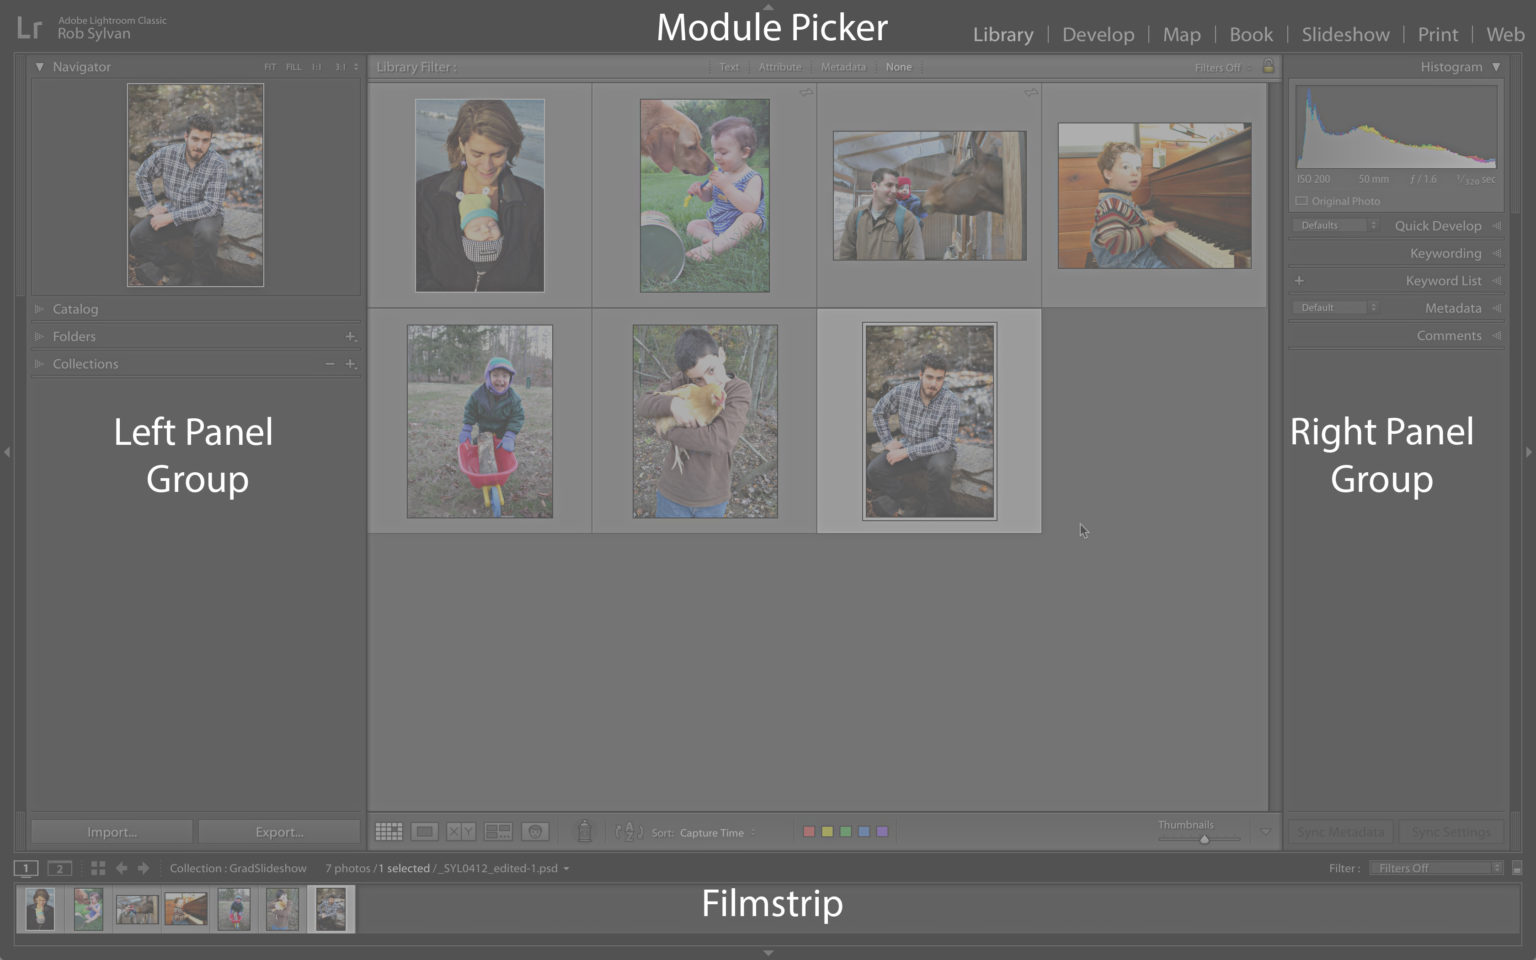
All Lightroom Classic modules have four main panels. These panels can be adjusted to your needs to change the workspace size, or to show only the tools you need for the current task. These four panels have names like Left Panel Group (top), Right Panel Group (bottom), Module Picker (top) and Filmstrip.
Clicking the edge of each panel will collapse it completely (you do not need to click on the arrow). If you right-click on the outside edge, you will get a context menu with more options.
Auto Hide & Show is a default option that I find a bit annoying. It will show the panel if you move your cursor too close to its edge. This happens far too often. When I want to collapse a group of panels, I set each panel on Auto Hide. If you select Auto Hide, the panel will automatically collapse and won’t expand until you click on its outside edge. You can then access all the items in that panel with a low-opacity panel. However, as soon as your cursor leaves the panel, it will automatically hide again. I can maximize my space by using this feature.
As with many things in Lightroom there are multiple ways to accomplish a task. You can use keyboard shortcuts to hide/show each panel group. However, I suggest you check out the list of all shortcuts. The keyboard shortcuts for each module can be found in the Window > Help menu.
There are two keyboard shortcuts that I always use and can easily remember. First, you can use Tab to hide and show both the left-hand panel group as well as the right-hand panel group simultaneously. Press Shift+Tab if you want to hide or show all four main panel groups at once.
You can make left or right panels wider by clicking the edge of the panel and dragging inward. I make the right panel in the Develop module wide to have more control over the sliders.
You can also make the Filmstrip shorter or taller by clicking on the edge below the Toolbar, and then dragging it up or down. If you shrink the Filmstrip, the thumbnails and the icons will disappear.
Individual Panels
After you’ve mastered the large panels, we will now look at the smaller panels that are contained in the Left and Rights Panel Groups.
Clicking on each panel’s header (not the arrow) will expand or collapse the panel. This will reduce the amount of scrolling that you do each day and only show the tools needed for the job. You can also Mac: CMD click / Win: CTRL-click any panel heading to expand or collaps all the panels in that side at once.
Mac: Option-click/Win: Alt-click on any panel header and you will activate what is known as Solo Mode. Solo Mode will only allow you to open one panel at a given time. It is now very simple to move between panels, with little (if any), scrolling. The last panel you used will automatically collapse as soon as you expand the new one. To disengage Solo Mode, Mac: Option-click/Win: Alt-click the panel headers a second time. While the Navigator panel, Histogram panel, and Preview panel within each module can be collapsed/expanded individually, these panels are not included with Solo Mode, or the expand/hide/all commands.